


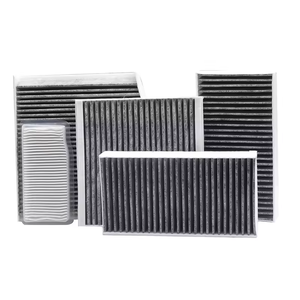


Types of Suzuki Swift Oil Filters
The Suzuki Swift oil filter is a critical component in your vehicle's lubrication system. It removes impurities and contaminants from the engine oil, ensuring smooth flow and maintaining protective properties. By trapping debris and particles that could potentially damage engine components, the filter plays a vital role in extending engine lifespan and optimizing performance.
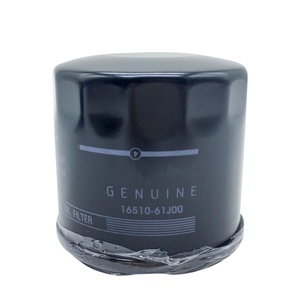
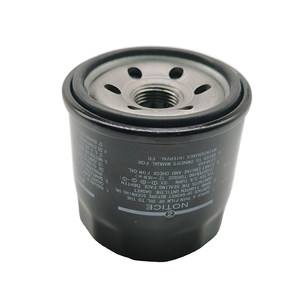
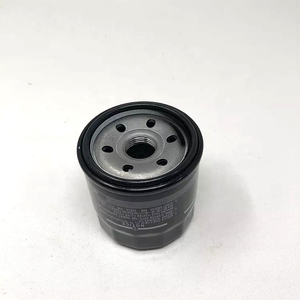
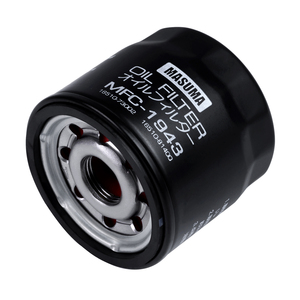
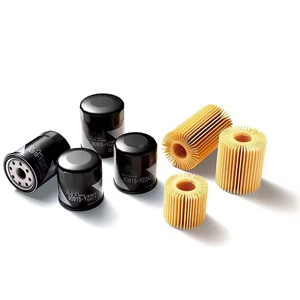
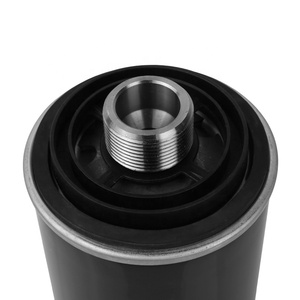
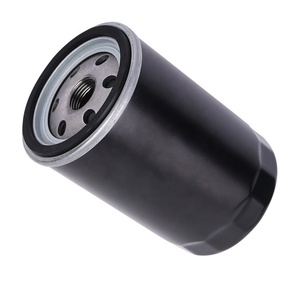
Spin-On Oil Filter
The most common type found in many Suzuki Swift models. These filters feature a simple screw-on design allowing for easy installation and removal during maintenance.
Key benefits: Easy installation, widely available, effective filtration performance
Best for: General everyday driving conditions, standard maintenance intervals
Cartridge Oil Filter
Used in some Suzuki Swift models, these filters are housed inside a filter cap and require a filter element, sealing ring, and spring to function properly.
Key benefits: Environmentally friendly (less waste), often more cost-effective long-term
Best for: Eco-conscious owners, newer Swift models designed for cartridge systems
Dual-Stage Oil Filter
A specialized filter type used in high-performance models like the Suzuki Swift Sport, providing enhanced filtration capabilities through multiple filtering stages.
Key benefits: Superior contaminant removal, enhanced engine protection
Best for: High-performance driving, Swift Sport models, demanding driving conditions
Expert Tip: Matching the correct filter type to your specific Suzuki Swift model is crucial for optimal engine protection. Always consult your owner's manual to verify the recommended filter type for your vehicle's year and engine configuration.
| Filter Type | Compatibility | Filtration Efficiency | Installation Difficulty | Relative Cost |
|---|---|---|---|---|
| Spin-On Filter | Most Swift models | Standard | Easy | Low-Medium |
| Cartridge Filter | Select newer models | Standard-High | Moderate | Medium |
| Dual-Stage Filter | Swift Sport models | Premium | Moderate | High |
Specifications and Maintenance of Suzuki Swift Oil Filters
Understanding the technical specifications of your Suzuki Swift oil filter is essential for proper maintenance and optimal engine performance. These specifications vary based on model year and engine variant.
Filter Media
Suzuki Swift oil filters primarily use synthetic materials that provide superior filtration efficiency and durability compared to traditional paper filters.
Performance impact: High-quality synthetic media can trap more contaminants while maintaining proper oil flow.
Micron Rating
Most Suzuki Swift oil filters feature a micron rating between 20-30 microns, enabling them to capture particles of this size or larger from the engine oil.
Performance impact: Lower micron ratings indicate better filtration of smaller particles, protecting critical engine components.
Oil Capacity
Depending on your Swift model and engine variant, the oil filter can typically hold between 0.3-0.5 liters of engine oil, sufficient to last until the next scheduled oil change.
Performance impact: Proper capacity ensures consistent filtration between maintenance intervals.
Bypass Valve
Suzuki Swift oil filters include a bypass valve that opens at 1.5-2.5 psi of pressure differential, ensuring oil flow even when the filter becomes clogged.
Performance impact: Prevents engine starvation even in suboptimal conditions, providing critical protection.
Anti-Drainback Valve
Made of durable nitrile rubber, this valve prevents oil from draining out of the filter when the engine is off, ensuring immediate oil flow upon startup.
Performance impact: Reduces dry starts that can cause significant engine wear over time.
Maintenance Schedule
Proper maintenance is crucial for optimal filter performance and engine longevity:
Important: Actual replacement intervals may vary based on driving conditions, oil quality, and specific model recommendations. Always consult your Suzuki Swift owner's manual for precise maintenance schedules.
Maintenance Best Practices
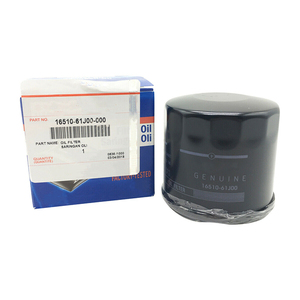
- Use genuine Suzuki filters - They're specifically designed for your vehicle and meet all necessary specifications for optimal performance.
- Regular inspection - Check for leaks or damage during routine maintenance and replace if necessary.
- Use recommended oil - The wrong engine oil can adversely affect filter performance; always use Suzuki-recommended oil types.
- Avoid frequent short trips - These prevent the engine from reaching optimal temperature, causing the filter to work harder than necessary.
- Maintain proper oil levels - Never overfill engine oil as this can cause the filter to clog prematurely.
- Adhere to maintenance schedule - Follow the recommended interval for changing the oil filter based on your specific driving conditions.
How to Choose the Right Suzuki Swift Oil Filter
Selecting the appropriate oil filter for your Suzuki Swift is a critical decision that directly impacts engine performance, efficiency, and longevity. Consider these essential factors when making your purchase:
Compatibility
Confirm that the filter matches your specific Suzuki Swift model year and engine type. Using an incompatible filter can lead to leaks, poor filtration, or engine damage.
Verification methods: Check the part number, consult your owner's manual, or speak with a Suzuki service technician.
Quality Standards
Choose filters that meet or exceed OEM standards to ensure proper filtration performance and engine protection. Premium filters often provide superior contaminant removal.
Look for: Filters from reputable manufacturers with clear performance specifications and industry certifications.
Filter Construction
Consider the filter's construction quality, including housing durability, sealing gasket material, and filtration media quality.
Best practice: Select filters with sturdy metal housings, high-quality synthetic media, and silicone anti-drainback valves for extended life.
| Selection Factor | Importance | What to Look For |
|---|---|---|
| Correct Filter Type | Critical | Match to your specific Swift model (spin-on, cartridge, or dual-stage) |
| Filtration Efficiency | High | 20-30 micron rating or better for standard driving conditions |
| Bypass Valve Function | High | Opens at appropriate pressure (1.5-2.5 psi) to prevent oil starvation |
| Anti-Drainback Valve | Medium-High | Silicone or nitrile rubber construction for durability in temperature extremes |
| Price Point | Medium | Moderate price range; avoid suspiciously cheap filters that may indicate poor quality |
| Warranty | Low-Medium | Manufacturer warranty that indicates confidence in filter performance |
Pro Tip: When in doubt between two filter options, choose the one with better filtration efficiency rather than focusing solely on price. The small additional cost is minimal compared to potential engine repair expenses resulting from poor filtration.
DIY Suzuki Swift Oil Filter Replacement Guide
Replacing your Suzuki Swift's oil filter is a fundamental maintenance task that can save you money while ensuring your engine remains properly protected. Follow these step-by-step instructions for a successful filter change:
1
Gather Necessary Tools and Materials
- New oil filter (compatible with your Swift model)
- Fresh engine oil (as specified in your owner's manual)
- Oil filter wrench or strap wrench
- Socket set and ratchet
- Oil drain pan (minimum 5-liter capacity)
- Funnel
- Rags or shop towels
- Disposable gloves
- Vehicle jack and jack stands (if needed for access)
2
Prepare Your Vehicle
Park your Suzuki Swift on a level surface and ensure the engine is warm but not hot (run for approximately 5 minutes). This warms the oil for better draining while preventing burns. Apply the parking brake and turn off the engine.
For better access, you may need to raise the front of the vehicle using a jack and secure it with jack stands. Never work under a vehicle supported only by a jack.
3
Drain the Engine Oil
Locate the oil drain plug under the vehicle. Position your drain pan beneath it, then use your socket wrench to carefully loosen and remove the plug. Allow all oil to drain completely (approximately 10-15 minutes). Once drained, clean the drain plug, replace the gasket if necessary, and reinstall to the specified torque.
4
Remove the Old Oil Filter
Locate the oil filter (typically on the side or bottom of the engine). Position your drain pan underneath to catch residual oil. Use an oil filter wrench to loosen the filter by turning counterclockwise. Once loose, carefully unscrew by hand and remove, keeping it upright to prevent oil spillage.
5
Prepare and Install the New Filter
Apply a thin coat of clean engine oil to the rubber gasket of the new filter. This ensures a proper seal and prevents the gasket from sticking during the next removal.
Screw the new filter on by hand until the gasket makes contact with the mounting surface, then tighten an additional 3/4 turn. Avoid using the filter wrench for installation as overtightening can damage the gasket.
6
Refill with Fresh Oil
Remove the oil filler cap on top of the engine. Using a funnel, add the recommended amount and type of oil for your specific Suzuki Swift model (typically 3.5-4.5 liters, but consult your owner's manual for the exact specification).
Replace the oil filler cap securely once filled.
7
Check for Leaks and Verify Oil Level
Start the engine and let it run for about a minute, then shut it off. Check around the oil filter and drain plug for any leaks. Wait approximately 5 minutes for the oil to settle, then check the oil level using the dipstick. Add more oil if necessary until the level reaches the "Full" mark.
8
Reset Oil Change Indicator (if equipped)
Some newer Suzuki Swift models have an oil change indicator system. Consult your owner's manual for the specific procedure to reset this system after completing the oil and filter change.
Safety Warning: Never dispose of used oil or oil filters in household trash or pour down drains. This is harmful to the environment and illegal in most areas. Take used oil and filters to an authorized recycling center or auto parts store that accepts them.
Frequently Asked Questions
How often should I replace my Suzuki Swift oil filter?
As a general rule, replace your Suzuki Swift's oil filter with every second or third oil change, typically every 5,000 to 7,500 miles under normal driving conditions. However, if you frequently drive in severe conditions (stop-and-go traffic, dusty environments, extreme temperatures), consider more frequent replacements—every 3,000 to 5,000 miles. Always follow the maintenance schedule in your owner's manual for model-specific recommendations.
Can I use any oil filter for my Suzuki Swift?
No, you should only use oil filters that meet the specifications for your specific Suzuki Swift model year and engine type. While aftermarket filters may fit physically, they might not provide the correct filtration efficiency, flow rate, or pressure resistance that your Swift requires. Using an incompatible filter can lead to poor engine performance, increased wear, and potentially void your vehicle warranty in case of related damage. Stick with genuine Suzuki filters or high-quality aftermarket options specifically rated for your vehicle.
What happens if I don't change my oil filter?
Neglecting to change your oil filter regularly can have serious consequences for your Suzuki Swift's engine. Over time, the filter becomes clogged with contaminants, reducing its effectiveness. This leads to:
- Restricted oil flow, causing engine parts to receive inadequate lubrication
- Increased engine wear due to contaminants circulating through the system
- Reduced engine performance and fuel efficiency
- Potential bypass valve activation, allowing unfiltered oil into the engine
- In severe cases, engine overheating and catastrophic failure
The cost of regular filter changes is minimal compared to the expensive repairs that can result from neglect.
Is it necessary to pre-fill a new oil filter before installation?
Pre-filling your Suzuki Swift's oil filter before installation isn't strictly necessary but can be beneficial. While modern engines typically build oil pressure quickly enough to prevent damage during startup with a dry filter, pre-filling provides immediate oil flow to critical engine components. If you choose to pre-fill, add clean oil to the filter until about two-thirds full, and always apply oil to the rubber gasket to ensure a proper seal. For easy-access filters, pre-filling is recommended as a best practice, but for difficult-to-reach filters where spillage is likely, simply lubricating the gasket is sufficient.
What are some DIY tips for successfully changing my Suzuki Swift oil filter?
For a successful DIY oil filter change on your Suzuki Swift, follow these professional tips:
- Warm, not hot: Change oil when the engine is warm but not hot (5 minutes after running) for better flow without burn risk
- Filter wrench selection: Use the correct size filter wrench to prevent damage; a strap-type wrench works well for most Swift models
- Avoid overtightening: Tighten the new filter by hand until snug, then an additional 3/4 turn—no more
- Double-check compatibility: Verify filter part numbers before installation to ensure the correct match
- Note the date: Mark the installation date on the filter with a permanent marker to track replacement intervals
- Clean contact surfaces: Wipe the filter mounting surface clean before installing the new filter
- Check twice for leaks: Inspect for leaks immediately after the oil change and again after a short drive


 浙公网安备 33010002000092号
 浙B2-20120091-4